TUNA
Most of the time, the task we are working on is within a specific scope and corpus where the general Large Language Model (LLM) is not necessary. For example, when we are working on a specific domain, we only need to train the model on the corpus of this domain. However, the training of LLM is very time-consuming and resource-consuming, and it is not easy to train a model that meets the requirements. Therefore, we need a tool to help us quickly train a model that meets the requirements. TUNA is such a tool.
TUNA is currently under beta mode. You can use TUNA here
Create a TUNA model
To create a TUNA model, you need to prepare the corpus to be used for training. The format of the corpus is a json file with the content as follows:
[
    {
        "messages": [
            {
                "role": "user",
                "content": "Correct this to standard English:\n\nShe no went to the market."
            },
            {
                "role": "assistant",
                "content": "She did not go to the market."
            }
        ]
    },
    {
        "messages": [
            {
                "role": "user",
                "content": "Who won the world series in 2020?"
            },
            {
                "role": "assistant",
                "content": "The Los Angeles Dodgers won the World Series in 2020."
            },
            {
                "role": "user",
                "content": "Where was it played?"
            },
            {
                "role": "assistant",
                "content": "The 2020 World Series was played in Arlington, Texas at the Globe Life Field, which was the new home stadium for the Texas Rangers."
            }
        ]
    }
]
The corpus is a list of dialogues, and each dialogue is a list of messages. Each
message has two fields: role and content.
The role field is used to distinguish the role of the message. It could be one
of the following values: user, assistant, system.
The content field is used to store the content of the message.
Once the corpus is ready, you can create a TUNA model by clicking the Create tuna
button on the TUNA page. You will be asked to enter the name of the model and
select the corpus file. Here is the screenshot of the page:

After that, you can click the Create button to
create the model. The model will be created in the background, and you can see
the progress of the model training on the TUNA page.
Deploy a TUNA model
Once the model is trained, you will see the training status indicator on the model card
will change to Success. You can click the Deploy button to deploy the model.

Once the inference status indicator on the model card changes to Running, you can
use the model to do inference.
Use a TUNA model
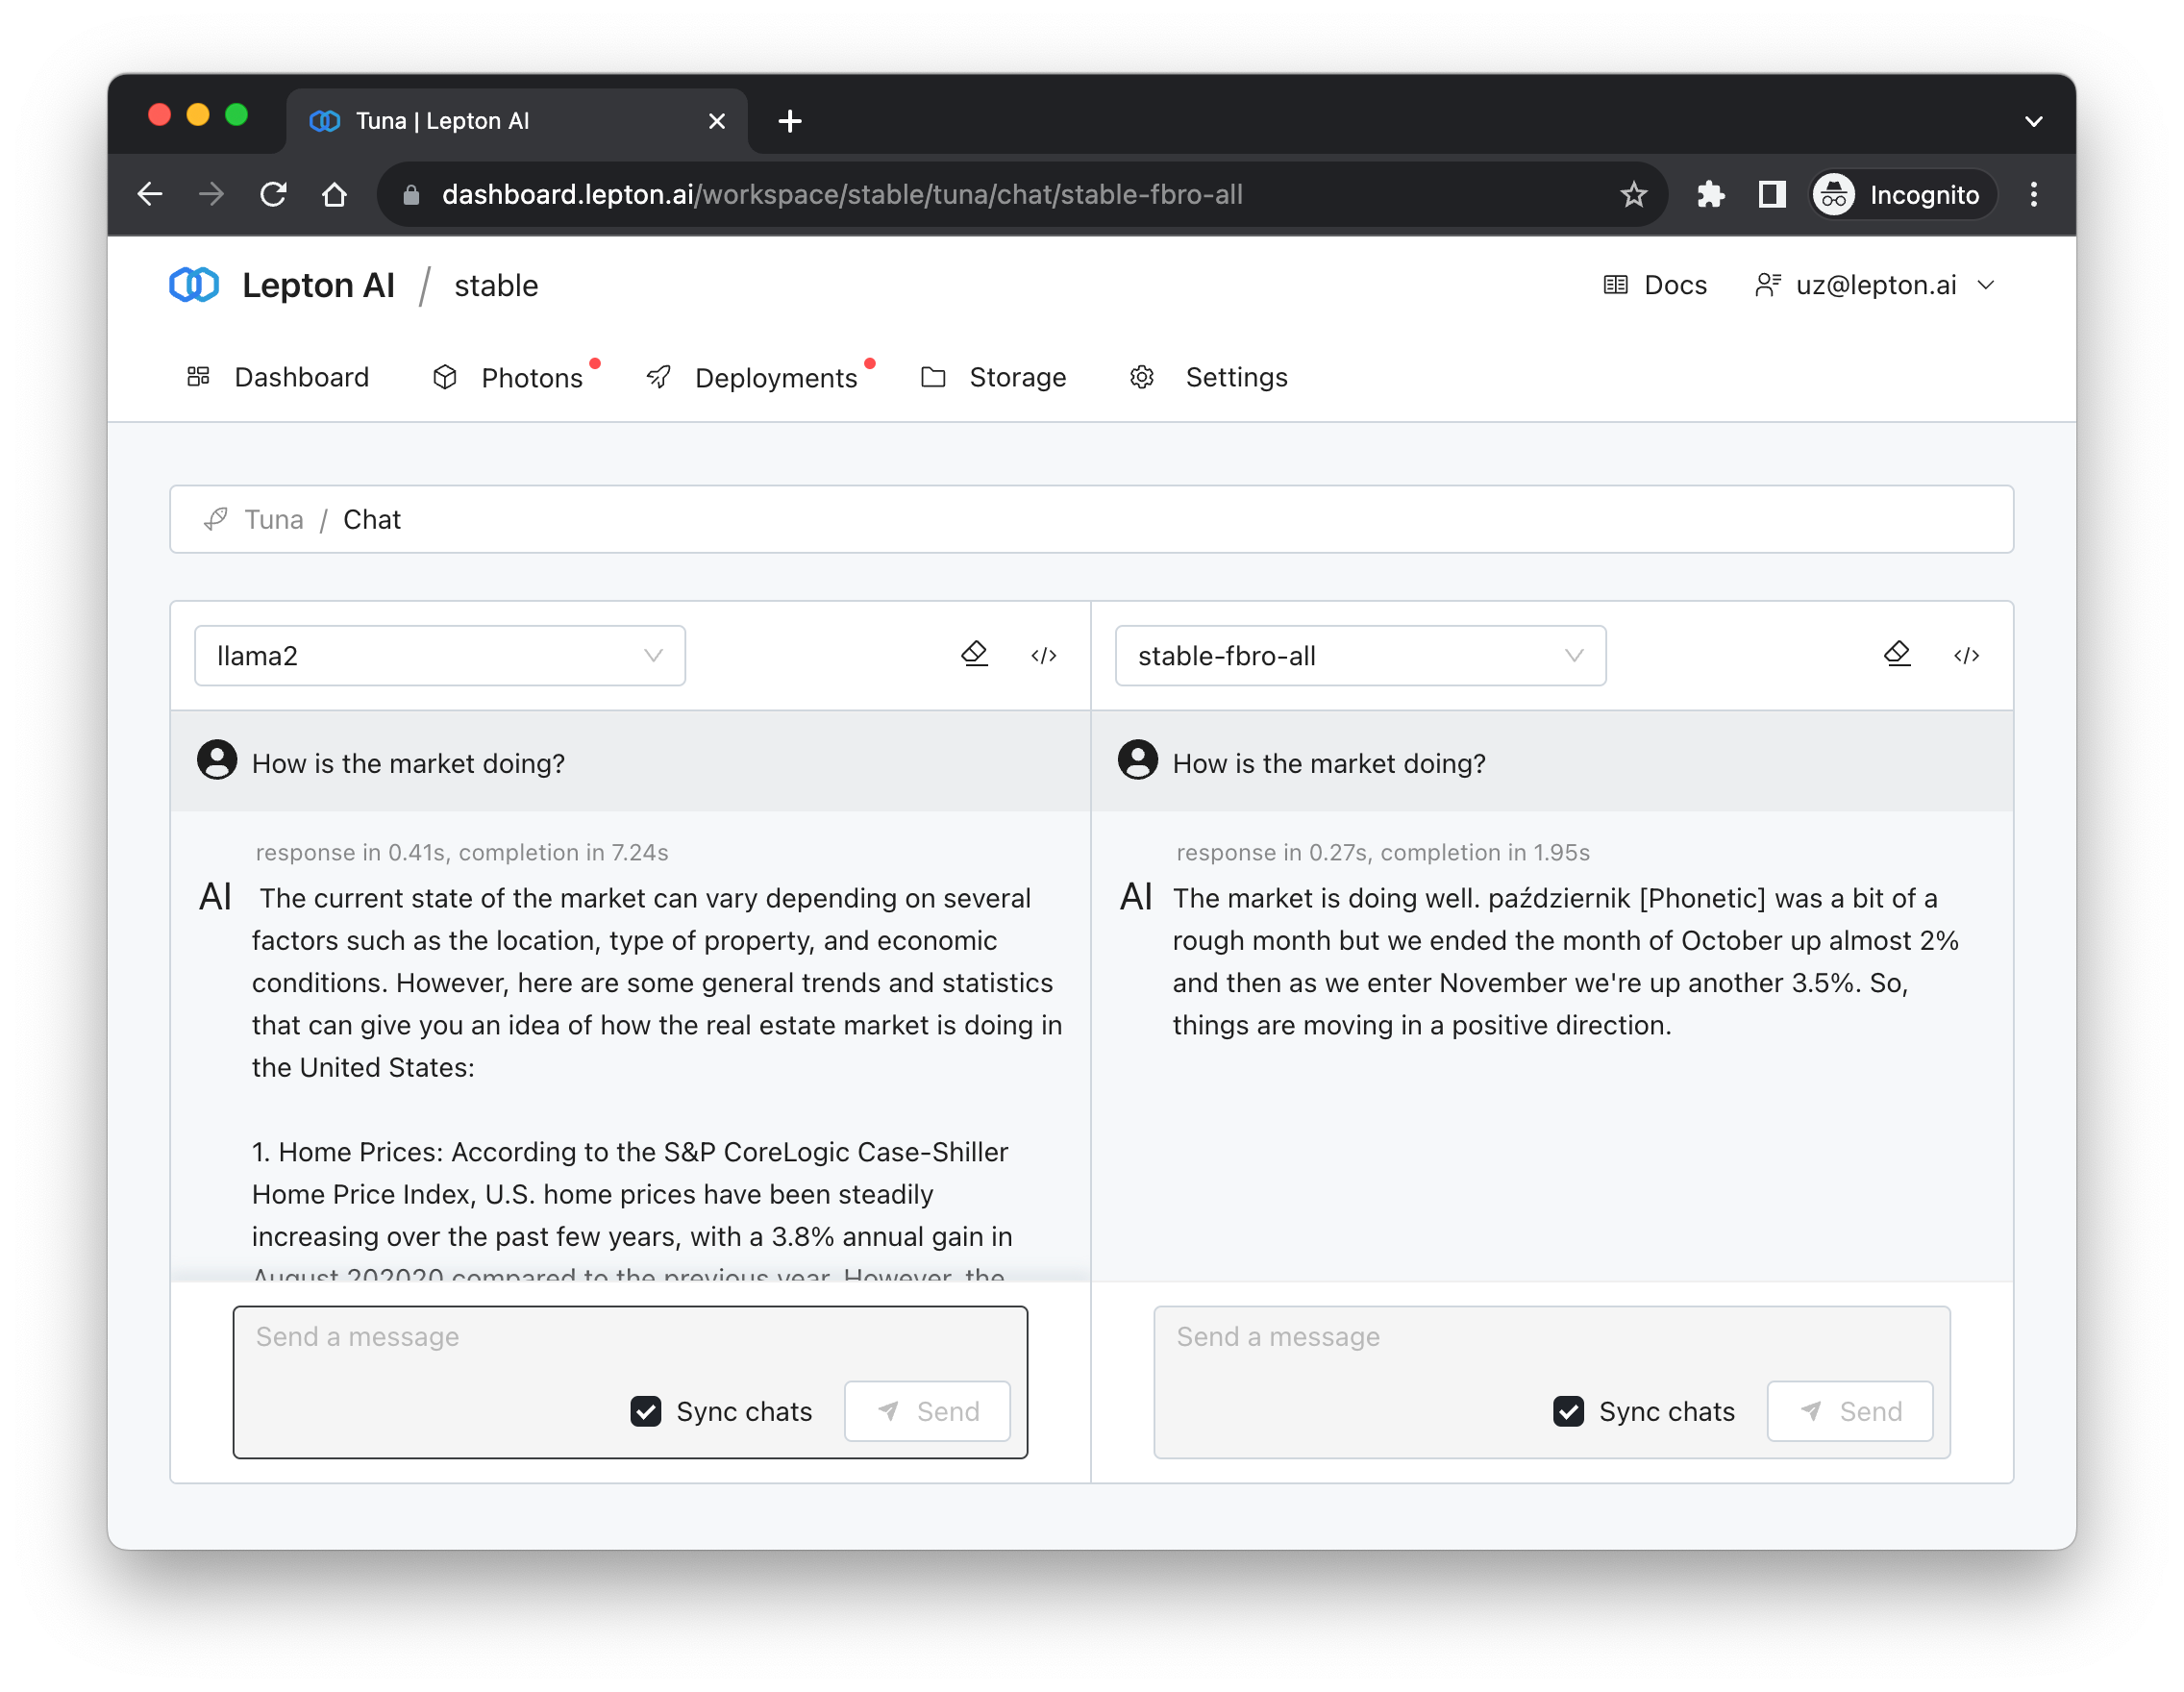
To use a TUNA model, you can either use the Web UI or the API.
To use the Web UI, you can click the Try it out button on the model card. You will
see a page like this:
To use the API, you can click the API button on the model card. You will see a page
like this:
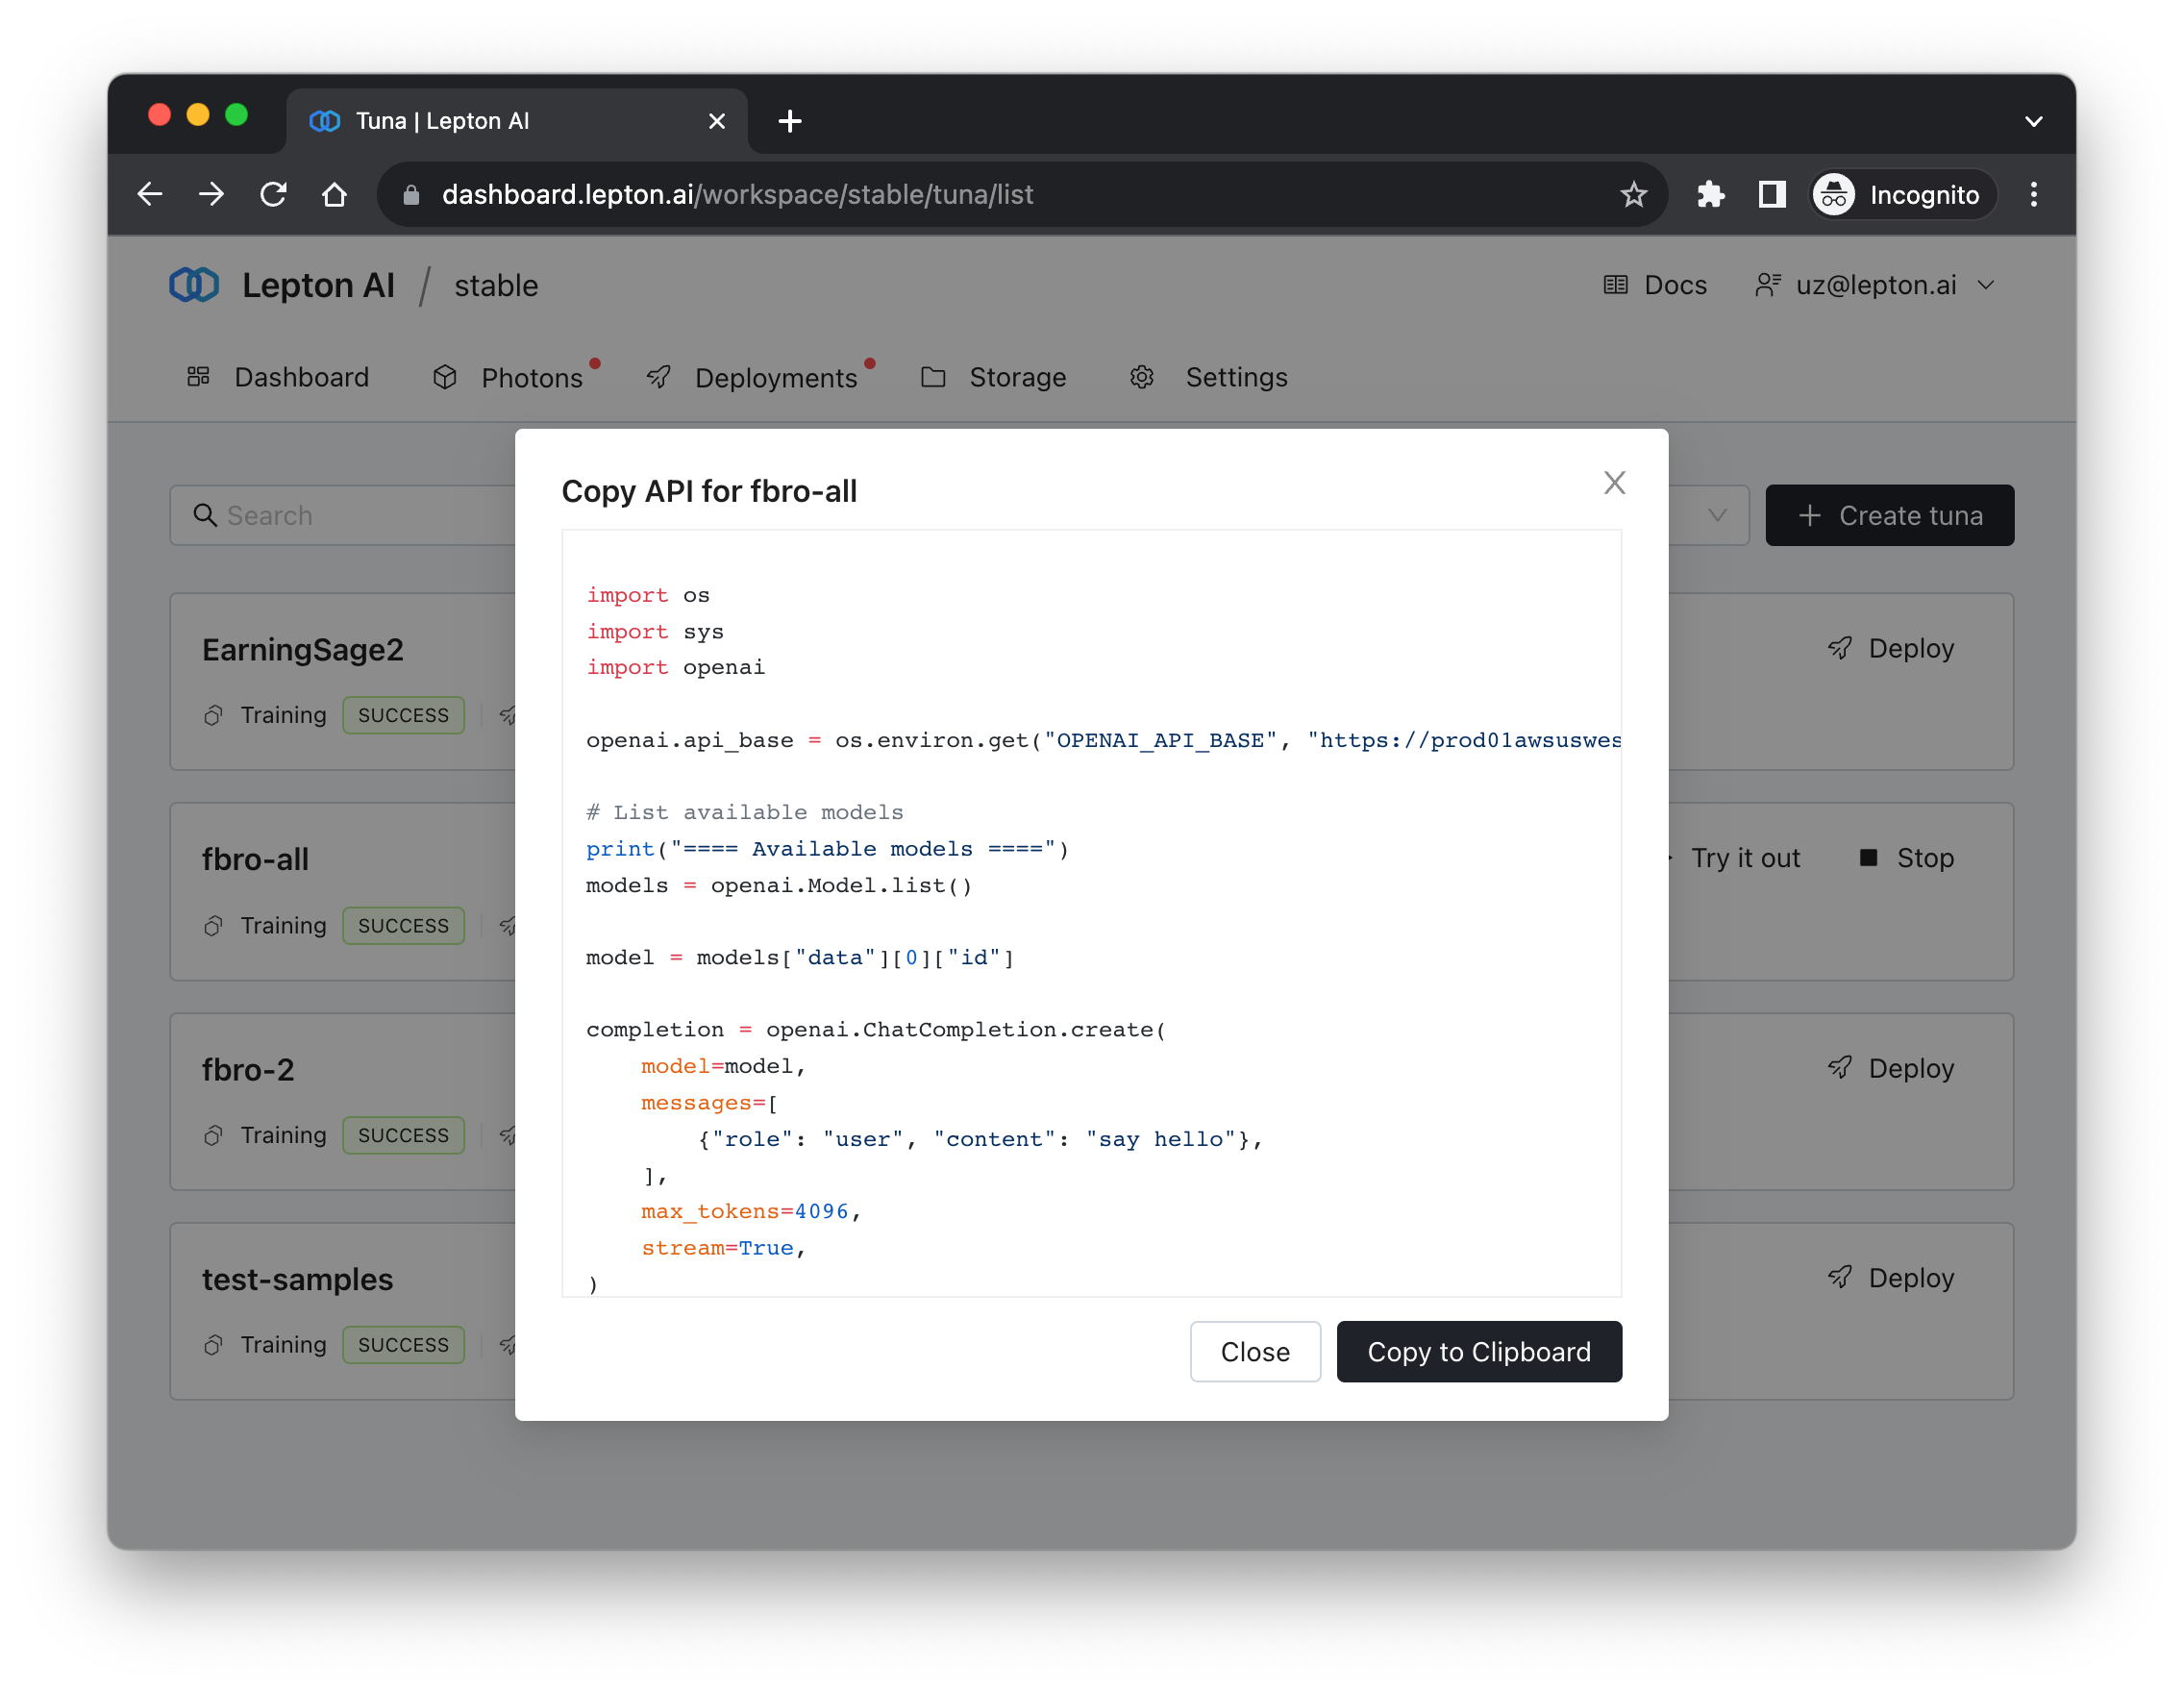
If openai.api_key is not set, you may set it by adding this line to the code:
opai.api_key = CURRENT_WORKSPACE_API_KEY